Translate

Saturday, September 1, 2012

March, back in time...

OMG!  How long has it been!  I kept on putting off posting because I didn't see the point of blogging just about the ceiling, or just about painting, or just about cabinets, or countertops. But now almost everything is done and the new baby is down for a nap so what the heck! Let's catch up!

Do you remember this...


 Now it looks like...THIS

And this...

Is...THIS

And THIS

After we put in the floors it was hard to decide what to do next.  I needed to re-texture the ceiling, paint it and put in the new lighting fixtures. Install the cabinets, tile the countertops, put up the backsplash and paint the upper cabinets. Install the kitchen sink, the garbage disposer, and the dishwasher.

 But what to do first?

The ceiling, duh, that would make the most sense.  But why would I do the ceiling when our cabinets are ready for pick up and cabinets are exciting!  So I go to the warehouse to pick up the cabinets, back-in our subaru outback and then watch as the freightworkers fight back their laughter.  Then I see the massive pile of boxes labeled "Peterson".   Ha, yeah, I don't think that will fit.  The manager came out and looked from my car to the pile of boxes and said "Let me offer you a deal. Delivery at cost."  SWEET! Instead of lugging these gigantic things back on my lonesome, I can get them delivered by some muscular men and rolled right into my living room!

So one day Adam and I unboxed these beautiful Masco Cabinets, just for a "dry fit" and then the next day we started screwing them in. And for amateurs I think we did a pretty good job.  It helped that the floor we laid was remarkably flat and a good foundation.  


 There was even room in the budget for Millie to get her own special cabinet.

And since we had the cabinets in we decided that the countertops were the next logical step.  Our material choice was something a little different, we ordered American Olean St. Germain- Chocolat in 12"x24" tiles direct from Dal-Tile.  Theorizing that we didn't want a bunch of grout lines that would make for an uneven cutting surface, but at the same time we didn't want to have to spend buku bucks on granite or some other slab style product, we agreed to do as much of the renovation ourselves as we could and that led us to the idea of these large tiles. 

Step One: Over the top of the cabinets we screwed down a layer of 0.53" plywood, as a base for the tile.

And then we took a mini-break weekend to San Jose and watched the Edmonton Oilers score on the Sharks faster than they have ever been scored on at home.

Back in town, we had to wait an extra week because our tile shipment was slightly delayed, but since we already had the plywood down we at least had something like countertop to work off of.  The remodel laziness had started to set in, and China East ( a great little place a mile away from our house with a $6 lunch special) was getting a lot of my business.

Finally, I received a phone call. The tile was ready for pick-up.

Step Two: Cut and lay the tile.

Step Three: Nail in the bumper.

Step Four: Grout. Voi La!


I have this bad habit of not reading directions very well, or at all.  And this has led me on two different occasions to make up ridiculous amounts of grout.  This was one of those occasions, to make the most of it I moved onto installing the backsplash as quickly as possible so we could avoid waste.  Me and my pregnant belly spent and evening cutting and putting up our beautiful glass tile backsplash.  Nothing like manual labor to make you wish that your waist was ten or fifteen inches slimmer!


We got the glass tile at the infamous Lowe's moving sale and even though we purchased all that was left on the shelf it wasn't enough to go from countertop to cabinet.  But, hey! I have all this extra grout!  Why not put it to use?


After smooshing up the extra grout to cover the dead space between the tile and the cabinets we debated painting it the same pale yellow we had planned form the rest of the kitchen.  We decided to leave it for a while and see how we felt a little later, and whether it was pure laziness or not it has remained unpainted.  Rustic, I like to say and really I do like it. Some things we planned and they turned out awesome other things just kind of happened and they turned out even better.  We are just lucky like that.


On to the next adventure, our cherry butcherblock is ready for pick-up at Lumber Liquidators.  Babysitters in place, I struck out with our good ole subaru legacy.  The butcherblock fit, no problem and I headed home.  When Adam got home from work we were able to move the countertop inside and cut it to fit.  Cutting the sink hole was a real hardship.  We broke two bits and got a third one stuck then when we went to pry it out with pliers it twisted into uselessness. We did, however, triumph in the end.

Next we screwed down a layer of plywood to the cabinets, squirted some glue, and screwed up through the plywood to anchor the butcherblock. I got some generic block oil from a restaurant supply company and oiled it down for a finish.

Unsatisfied with the blonde look of the wood, I did some research and happened upon dark raw tung oil at www.realmilkpaint.com.  Click, shopping cart, check out and... in three weeks my dark raw tung oil will arrive. Yippee!

One day it happened, the procrastinating ended and the ceiling got textured, my triceps screamed at me for two days afterwards but it was accomplished.  My dad had mentioned a skip-trowel technique and I tried to follow his basic guidelines, as best as I could understand them from our over-the-phone conversation.  And my understanding was to glob spackle in random places and then smooth them out, but not entirely smooth.  What I ended up with looked something like mexi-style plaster.  Well, the hard part was done, so the painting could commence! The color "Butterfly Bush" (a lot of jokes were traded back and forth between me and Adam at the expense of this poor paint), a cheerful yellow, in no other finish than semi-gloss.


 And then the month was over!

It's a little hard to keep things straight, but our extensive photo archive is helping me quite a bit. I figure it will be easiest to catch you all up if I go month by month. March down! April and May to go!

 On a side note: Pregnancy is a funny thing, when I was pregnant (spoiler alert! I am no longer pregnant) I dodged every picture possible but now looking back I wish I could see how big I really was, in the belly.  That's it only the belly, not the arms or legs or neck (ugh) or face (double ugh), maybe the boobs would be ok, so just the torso.  I wish I had taken photos of my pregnant torso.  Because I feel like what we accomplished was pretty impressive but I don't have any physical proof of exactly how amazing it was for me to lean over let alone do anything while in a leaning position.


Tuesday, February 21, 2012

Plumb Tired

Monday morning Adam shut off the main water to the house and took a hack saw to the galvanized steel supply lines that ran to the kitchen sink.  He worked hard all day under the house trying to loosen the threads of the pipes so we could tie in our extensions.  We went to Ace and Adam picked up a propane torch to heat up the the pipes and hopefully loosen up the pipe dope that had been aging for 65+ years. It took almost all of Tuesday to loosen the pipes, with much banging.  Then we drilled holes for the new supply pipes and attached the new soft copper tubing to the old galvanized pipe with some dialectric unions.  In hindsight some hilarity ensued that Tuesday night as we tried to flare our copper pipe so that it would fit into the compression joints I got at Lowes. 

It wasn't until Wednesday morning when I went to Home Depot that someone explained to me that there are three ways to join copper tubing, sweating, compression, and flaring.  We were working with some oddly sized pipe copper nom. 3/8" o.d. 1/2" and most of the fittings we got were 5/8"!  So of course it wasn't working, we didn't even have the right size fittings!  While Adam was at work on Wednesday I got the correct size fittings and trekked under the house to replace the odd size ones.  It had snowed early that morning, so instead of the regular discomforts of being six months pregnant I got to add being six months pregnant, covered in snow and scooting in the pitch dark crawl space under our house.  It really wasn't that bad and in time for my job interview I had the odd couplings switched out.  I switched out the push-fit valves for some threaded brass valves.  When Adam got home we flipped on the main water and sure enough there were leaks in almost every place possible. That night Adam was swept with a stomach flu and called into work sick Thursday.  And although he was sick, he is a wonderful man and worked on the plumbing with me anyway.  We tweaked some things and slathered some pipe thread compound.  The compound instructions said it took 48 hours to set, in a water-free environment. 

We waited until Sunday to test the pipes and when we did there were still a couple of leaking couplings.  After another trip to the hardware store to get some fresh compression sleeves we reassembled the compression joints one more time and were met with success!  Only a week of no water and we successfully did our own plumbing.

On Thursday while Adam worked on the plumbing I went to Lumber Liquidators (301 sq. ft. for $1.49/sq. ft.) and picked up the Nirvana laminate we had on order for our dining room and kitchen. On Saturday my sister-in-law Bethany took Millie off my hands so I could focus on laying the flooring. 


I was able to lay the dining room and then Adam and his dad finished the kitchen.  We finished with only one board to spare. 


With the floor laid the boys were able to bring in the new fridge and range.  And then the cabinets were delivered.  This week the kitchen is really coming alive.  Before we had to imagine what it would look like but now its really coming together. 

Sunday, February 12, 2012

Making It to the Refinish

After reading up on how easy it is to refinish hardwood floors it was time to put it into practice.  So Tuesday morning we went to our local Home Depot Tool Rental Center and picked up a drum sander.  After a few unwieldy practice passes Adam got a feel for it and managed to rough sand, patch and  fine sand the floor in a couple of hours.  It was my job to sand down the edges, that Adam couldn't reach with the drum.  It was during this that we discovered our hand sander was not up for the job and it was time for an upgrade.  So, yay, another trip to Home Depot. 


With all the sanding done in pretty much one day.  I had plenty of time to lay down a base coat on Wednesday morning.  Adam picked up a buffer on his way home from work.

Despite what we had read about the difficulty of drum sanding and the relative ease of using a buffer, Adam found the buffer onerous in comparison with the drum sander.  But it wasn't the buffer that kept us from sleeping in our house Wednesday night, nope that was the acetone based lacquer that I laid as our base coat.  Millie and I shacked up at the Baymont Inn while Adam strapped on the respirator and buffed and buffed.  He joined us later for dinner and a night's sleep in a fume-free space.

The following day I dropped Millie at daycare after taking FULL advantage of the complimentary breakfast and headed back to the house to lay another layer of lacquer. 


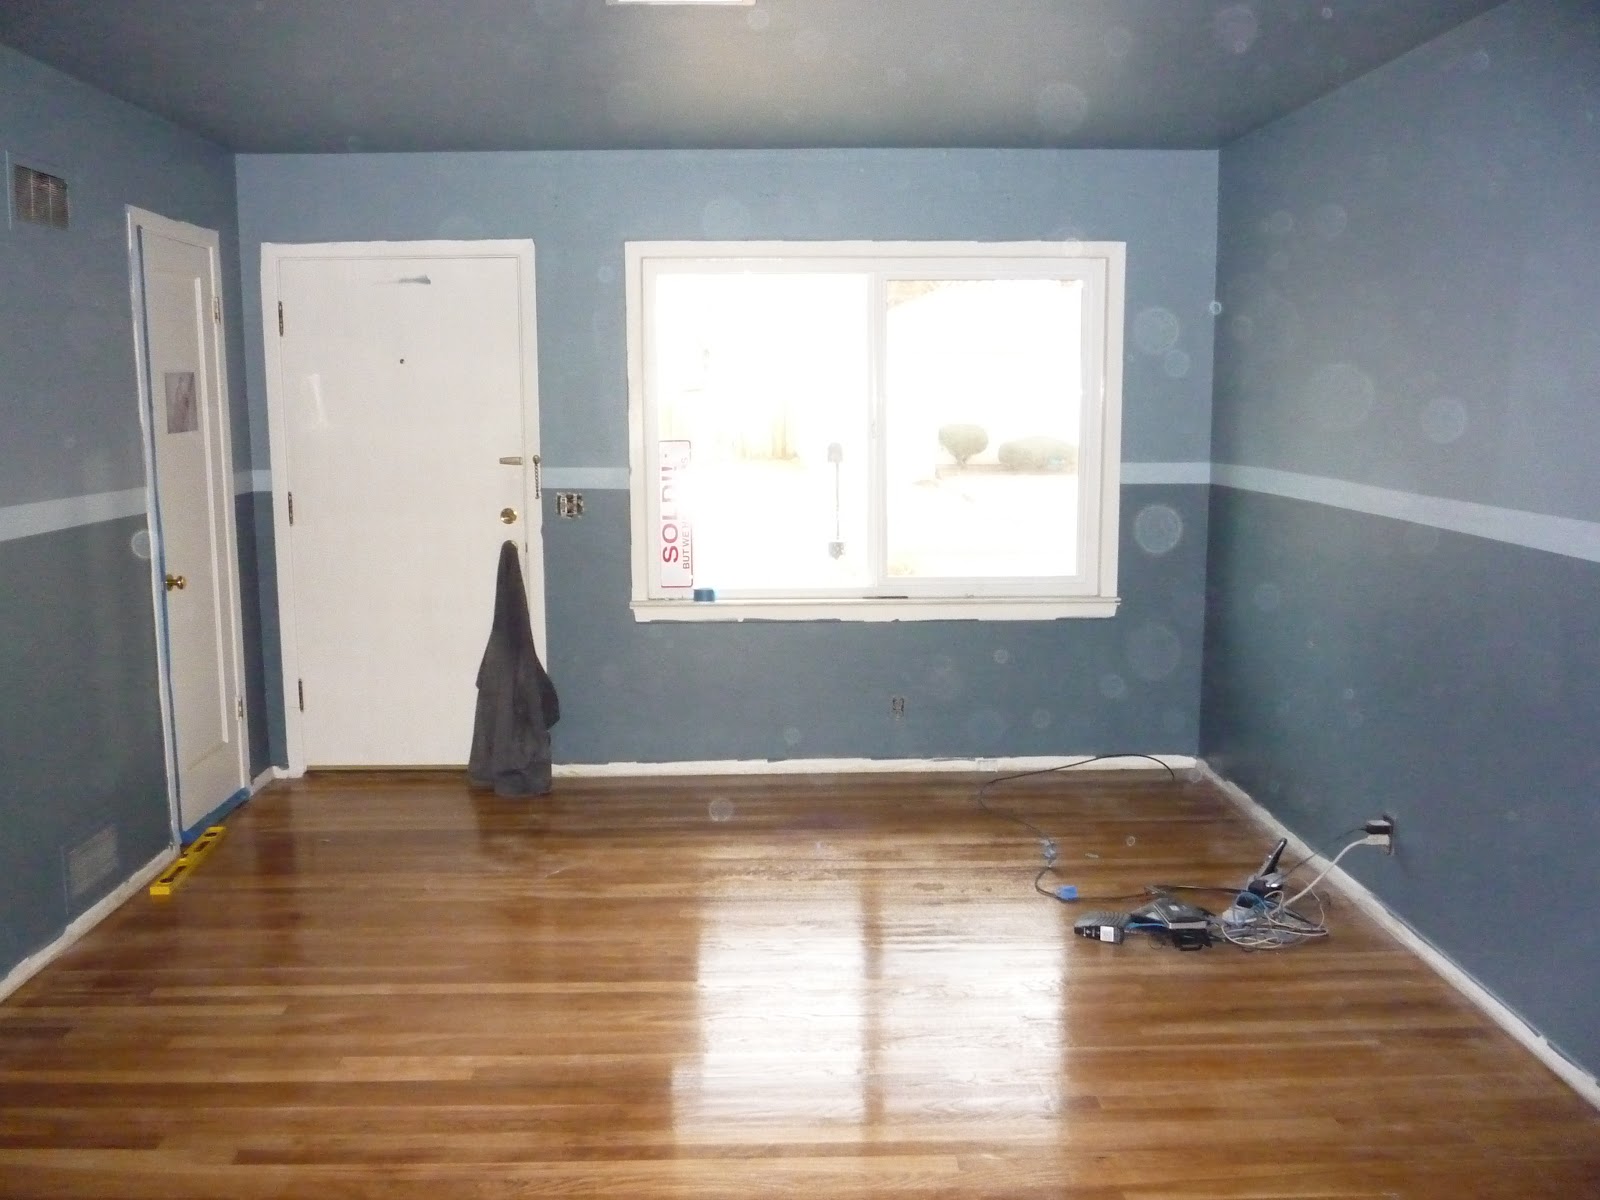
Thanks to a full day of  open windows and a good breeze we were able to spend the night in our own home Thursday night.  Friday I bought a gallon of water-based polyurethane and laid down two more coats.  I also got a five gallon tub of blue-gray from the mistint pile at Kelly-Moore for $20.  With the floors done, Adam and I started on building the pony wall for the kitchen island and painting the living/dining room.  No more bland beigey-white, time to class it up with two-tone blue-gray and a painted "chair rail".


The final product is just SO pretty!


Tomorrow we take on the wiring and plumbing, eek!

Saturday, January 28, 2012

Reno Kitchen Renovation: Part One

Let Fly the Hammer

We are back from traveling for the holidays, we have had a chance to settle back into our Reno lives so now its time to mix things up again.  What started as a desire for a dishwasher has become a full blown kitchen remodel.  New floors, new cabinets, a new layout, new light fixtures, new ceiling fan, and best yet new stainless steel appliances.  With a target budget of $5,000 let's see how far we can make it.  A couple things are working in our favor in that direction, the manufacturer's are offering awesome rebates on appliances and the Lowe's by our house is closing and for the last week everything has been 50% off. 

First here are some pictures of what we had to work with initially.


And here are some sketches of what we are working towards.


Saturdays Adam works but I wanted to hit this thing head on, so today Will and Chris came over to lend a brotherly hand.  A craigslister came to take the base cabinets and was able to remove them pretty lickety split. In less than an hour he was in and out.  Then we got to get down to the dirty work!  Ripping up the indoor/outdoor carpet and tearing up the particle board floor that covers the mysteries underneath.


The brothers did the hard work and I got to sweep up after.  Next up, refinishing the hardwood floors and then moving the plumbing for the sink (dunh dunh dunh). 

Monday, September 26, 2011

Out with the Old in with the New

We moved in all our things over four days with some help from family and friends.  The move forced us to reflect on our relocation the previous year.  When we came down from Washington we fit everything we had in the world into an 8'x5' space, the overflow was either jammed in our Mini or sent to Palouse Treasures (the local thrift shop).  This time we rented a 14' truck and in no time we had that thing packed like a can o' sardines.  About four more trips with our cars and the apartment was cleared out.  The only thing we had to abandon at the dumpster was an old office chair. We moved the furniture into the garage mostly and the boxes into the dining room.

And then the work began. 

They say on HGTV to live in a house a while before making any changes, because after you have lived in it you will know better what changes need to be made.  Yeah, screw that.  I know myself better than to believe that crap.  If we don't do it now it ain't never going to happen.  So the Tuesday after we got the keys and the second day of actually living in our house, our house, oooouuuurrrrrr hoouuuuuusseee (I still LOVE saying it!) we had carpet installed in the TV room and Millie's room.  We got it on Craigslist special from an out of work flooring contractor.  $635 for the two rooms and the remnant removal.
 The old stuff, uck!
 The TV room stripped with just the fresh padding.
 A peek at the beautiful hardwood floors before they get covered up again.
 Ahhhh, nice fresh carpet for Millie to scoot around on!
TV room complete with fresh carpet, fresh paint, lazy boys and media center. 
Just missing one thing...yeah... the TV.

The next project was emancipating the hardwood floors in the living room and hallway. In one night I ripped up the living room and rolled the musty, old, shag carpet up along with the pitiful, disintegrating, yellowed padding.  I managed to tear up most of the staples and one wall of tack board before calling it a night.  The following day Adam helped out, he ripped out the carpet in the hallway and the remaining tack board, what a guy!  : D

A lot of dust came up with that carpet.

The hardwoods look pretty good, there is a little water damage in a couple of places but it's nothing that we can't live with for a while.  The plan being that when we remodel the kitchen we can refinish the floors then, right? Righhhhhhhhht. 

After three weeks of living in our house we figured it was about time to get our hands dirty.  Tiling the hall bathroom sounded like an easy "weekend project".  Uh-huh. Will helped me take out the toilet and Adam removed the vanity.  But, yeah, I totally underestimated the amount of elbow grease and will power that it would take to rip out the old laminate.  As per usu I was able to start the job over my weekend and Adam was able to finish it on his weekend.  Then I went to Lowe's and grabbed grout, a grout kit, and some "self-leveling" quickset =  $70.  We laid the quickset one night and started tiling the next.  It worked pretty well, me laying and Adam cutting. We grouted the tile the day after that and by the weekend were able to replace the toilet. The quickset didn't really "self-level" to expectations so the tile isn't super level but it looks pretty decent, at least for first timers.  


Before...During...After

Now that we have the floor tile done the next step will be tiling the tub surround.  We picked out some nice glass tile the other day on our lunch break.  All that's left to do is find some time.

Saturday, September 3, 2011

The Keys to Paradise

I waited all day with bated breath.  I called my realtor twice before she kindly told me that she would call me when the transaction went on record and the keys were delivered to her office. Around 2:45 pm Joan called and said she would meet me at my house with the keys at 4 pm. Our downstairs neighbors at the apartments were moving too and needed a break from packing so I invited them to come and see the house. We caravanned over there and right at 4 pm I was turning an old tarnished brass key in my very own front door lock. I gave my very first tour of my new home, right then and there.

That night I could hardly sleep, I was so excited to get in and paint!

The next morning I dropped Millie off with her aunt and uncle and headed for our house.  I started by spackling dents and scrapes in the walls, then moved on to the wallpaper border in the master bedroom. The wallpaper was old enough that it came down with relative ease and all I had to use was a squirt bottle full of warm water.  I took a break and walked over to the neighbors to collect the paint that I stored in their garage.  Gene was eating breakfast and didn't have his hearing aids in so even though I could see him and I was knocking and ringing the door bell I didn't get his attention.  I went around back and his wife was out with their dog, Coco.  I introduced myself and asked if she could open the garage.  She complied readily, adding that her name was Emmy.  In the garage she filled me in on a little history of the neighborhood, burst into tears at the mention of Dorothy (the previous owner of our home), and informed me that under the mottled brown/orange/gray shag carpet there were hardwood floors.  After moving the paint from garage to garage I moved on to mixing paint for Millie's room and succeeded in creating a rich fuschia.  The paint mixing was followed by a realization.  I didn't have any paint pans.  Crap!  Luckily for me Chris was on his way to bring me lunch and offered to pick some up.  So I started with a brush, painting the hard-to-reach areas. 

Pretty soon Chris arrived laden with burgers, fries and paint pans.  It was his first time inside, so he took his camera and snapped off some shots.  We ate and then investigated the hardwood floors, oh, and our findings were beautiful.  They spawned further investigation which resulted in a full on demolition of the faux wood paneling and marbled mirror wall in the living room.  Chris took off after an hour or so and I finished the bottom half of Millie's room. 

In the garage I mixed up the top color, a soft yellow.  I was 80% done when Adam arrived with the young owner of said room and Greek take out . We had a nice picnic in the backyard.  Adam took over the painting for a while and I watered the lawn with Millie.  It was nearing 7:30 pm and she was none too happy to be receiving peripheral splashes from the hose.  I handed her off to Adam and sent him back to our dinky apartment.  I stayed and finished up the paint job in Millie's room, then I went through the house and made sure all the paint supplies were away and all the paint cans had their lids, at long last I shut off the lights and stepped onto the porch to lock up fumbling in the dark with the unfamiliar and yet wholly comforting keys.

Thursday, September 1, 2011

Signing Away Your Life

I logged on to the Mini Financial site yesterday morning to view our payoff amount, to see if the check had cleared.  But, no, the balance was still there.  A little later, still there. Around noon, it was still there.  I began to wonder if my compulsive statement reviewing was doing any good when I logged on to find the site was unavailable.  An hour later I checked it to find the same message, then it clicked, hmm if they were making changes then the site might be unavailable.  Ten minutes later I was asking a Mini USA representative to e-mail an official letter declaring the sum paid in full and our financial obligations terminated! 

Today, Adam called in sick (with intergrity unmarred because he is in fact sick- with whatever end of summer flu bug that is going around) and I canceled my afternoon shift.  We waited all day for the Title company to contact us with an appointment time.  Then at 1:29 pm, as we were driving to the bank to submit the wire transfer for our down payment, we received notification through our realtor that our appointment was at 3 pm.  The transfer went smoothly and then we had some time to kill.  First order was getting a light lunch, Brugo's on the corner of Kietzke and Virginia, yummy!  Best cheesesteak ciabatta of my life!  Then some browsing at Borders, may it rest in peace. Finally, 2:45 pm rolled around and we excused ourselves to be a little punctually premature.

Joan, our realtor, met us at the Title office.  We waited about ten minutes and then I received more than enough opportunities to perfect my new signature.  The Title officer, Susan, was wonderful, nice and gracious.  She was thrilled to pieces with the fact that Millie was sitting on her desk munching on a rice cake and rifling through the loan documents as she explained them to me and Adam.  And Millie for her part was just as wonderful.  Yes, there was a time when she managed to call another Title officer via the intercom.  Followed by the decision to make Susan's business cards rain all over the table.  But for the most part she was her angelic self, cooing and gumming her rice cake in peace. After an hour and a half of sign here, date here, initial here.  We were done!  And the best part!  Our mortgage payment on our 1300+ square foot house (complete with front and back yard and one car garage) is going to be five bucks LESS than what we are paying now for a 900 square foot apartment.

Tomorrow, we get the keys...


Here are some teaser before photos of our new home.


 Millie's Room
 Laundry Room
 Kitchen
 Master Bedroom
 Master Bath
 Office
 Hall Bathroom
 View from the Driveway
 Patio (back entrance)
Garden and Storage Sheds